Pixel art character sprites at 16x16 and 32x32 that read well
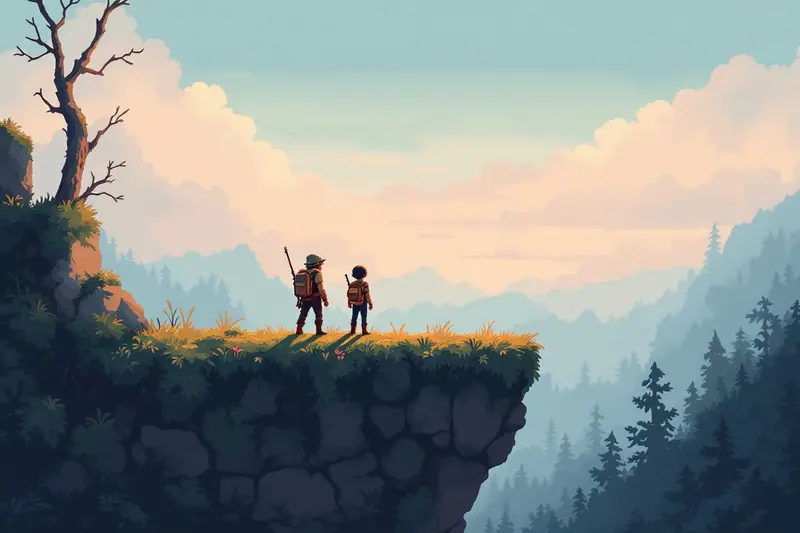
The character is the sprite players look at most. They watch it for the whole game, usually in the middle of the screen, and they judge the feel of the controls partly by how it moves. It is also the hardest sprite to get right at small sizes, because you have to fit a person, a personality and a direction into a few hundred squares. This piece is about designing a pixel art character that reads, at the two sizes most small games use, and then making it stand, walk and turn.
If you have never drawn pixel art before, start with the basics of making pixel art: palettes, outlines and clusters. Here I will assume you know your way around a pixel editor and want to focus on characters.
16x16 or 32x32: pick by what the game needs
The two sizes are less a question of skill than of what the player needs to see.
| 16 x 16 | 32 x 32 | |
|---|---|---|
| Pixels to place | 256 | 1,024 |
| Face | 2 to 4 pixels: eyes only, maybe a mouth | Room for eyebrows, mouth shapes, expressions |
| Hands | 1 pixel, often merged with the arm | Small but readable, can hold items |
| Walk cycle | 4 frames is common | 6 to 8 frames is common |
| Time per frame | minutes | much longer |
| Best for | top-down RPGs, roguelikes, crowds, jams | platformers, action games, close cameras |
A good rule for jams: 16 by 16. You will draw every animation four times over (or at least three, with mirroring), and the cost multiplies quickly. For a game where the character is big on screen and expression matters, 32 by 32 is worth it.
Whatever you choose, the sprite cell and the visible character are not the same thing. A 16 by 16 cell often holds a character 12 or 13 pixels tall, leaving room for a hat, a jump squash or a weapon swing. Decide where the feet sit, usually on the bottom row or one row above, and keep that line fixed across every frame. Feet that drift up and down between frames are the most common cause of a character that seems to float.
Silhouette first
Before colour, before outlines, fill the character with one flat colour and look at it at 1x. You should be able to tell:
- where the head is,
- which way it faces,
- roughly what kind of character it is (small and quick, heavy, magical, armoured).
Big, simple shapes do most of the work. A wide hat, a long scarf, a large backpack or a pointed hood gives the silhouette a feature that survives at tiny sizes. Thin details such as a sword held flat against the body do not, because they merge with the outline.
At 16 by 16, proportions are close to chibi: the head is often 6 or 7 pixels tall in a 13 pixel body. At 32 by 32 you can move towards more natural proportions, but heads still tend to be larger than life. Players read faces first, so give the face room.
One test I like: draw the silhouette in black on a mid grey background, then flip it horizontally. If the flipped version suddenly looks wrong or reads as a different character, the design leans heavily on asymmetry, and you will need separate left and right sprites instead of mirroring one.
Palette ramps for a character
A character usually needs three or four materials: skin, hair, main clothing, and an accent. Give each a short ramp, dark to light, and share colours between ramps where you can. A shared dark colour for the outline and deep shadows ties the sprite together and keeps the count down.
A palette for a 16 by 16 character might look like this:
outline / deepest shadow   #1d1726
skin                       #a35d4a  #e0a07c
hair                       #4a2f3f  #7d4b5c
tunic                      #24496b  #3c7aa8  #78b6d6
accent (belt, scarf)       #d9a33f
eyes                       #1d1726 (same as outline)
That is nine colours. At 16 by 16, three tones for the main clothing is often the maximum that still reads; two is fine for skin and hair. At 32 by 32 you can afford one more step per ramp, and maybe a separate highlight colour for metal.
Keep the character more saturated and more contrasty than the backgrounds you plan to use. If the backgrounds are not drawn yet, write it down as a rule for later: backgrounds stay calmer than the hero.
Faces at tiny sizes
At 16 by 16, a face is often just two eye pixels on a skin coloured block. Where you place them changes everything. Eyes close together and low on the head make a character look young and cute. Eyes high and wide apart look older, or odd. One pixel of difference matters.
For a side view, show one eye, placed towards the front of the head, and let the hair or hat define the back. For a front view, two eyes with one pixel of skin between them is the classic small sprite face. A mouth is optional. Many readable 16 pixel characters never have one outside of emotes.
At 32 by 32, you can draw eyes 2 by 2 or 2 by 3 pixels with a highlight, which allows blinks and looks. A blink is one of the cheapest bits of life you can add: a single frame with the eyes closed, shown for about 100 milliseconds every few seconds.
The idle animation
An idle animation stops a character from looking like a cardboard cutout when the player lets go of the controls. It should be subtle. Big idle movements are tiring to watch for hours.
The usual small sprite idle is a breathing bob of one pixel: the head and torso move down one pixel and back up, while the feet stay put. Four frames is enough:
| Frame | Change | Hold |
|---|---|---|
| 0 | neutral | 300 ms |
| 1 | head and shoulders down 1 px | 200 ms |
| 2 | same as 1, scarf or hair settles | 300 ms |
| 3 | back towards neutral | 200 ms |
That is one second per cycle. Uneven holds feel more alive than evenly timed frames, because real breathing is not a metronome. For a 32 by 32 character you can add a second motion, such as a hand shifting or a cape tip moving, on a different rhythm.
The walk cycle
A walk cycle is where most character sprites live or die. The good news is that it is mostly a pattern you can learn.
For a side view walk, the key poses are:
- Contact: one leg forward, one back, both feet on the ground. This is the widest pose.
- Down or recoil: the body sinks as weight lands on the front foot.
- Passing: the legs cross under the body, one foot lifted. The body is at its highest.
- Up: the back leg pushes off.
Then the same four with the legs swapped. That gives an eight frame cycle. At 16 by 16, you can compress it to four: contact, passing, contact with legs swapped, passing with legs swapped. The body bob, one pixel down on contact and one pixel up on passing, does a surprising amount of work at this size.
Timing depends on the movement speed. A rough starting point:
| Frames in cycle | Frame duration | Cycle length | Feels like |
|---|---|---|---|
| 4 | 150 ms | 600 ms | easy stroll, top-down RPG |
| 4 | 100 ms | 400 ms | brisk walk |
| 8 | 80 ms | 640 ms | smooth platformer walk |
| 8 | 60 ms | 480 ms | run |
The main thing to match is foot speed against ground speed. If the character moves 60 pixels per second and a full stride covers about 12 pixels, a cycle with two strides should take about 0.4 seconds. If the cycle is much faster than that, the feet look like they are skating. Slower, and the character looks like it is being dragged.
Arms swing opposite to the legs. At 16 by 16 an arm might be a single pixel that moves forward and back by one; that is enough.
Facing directions
Side view games need left and right. Most of the time you draw right facing frames and mirror them for left. Mirroring halves the work and nobody minds, as long as the design is roughly symmetric. Things that break it: a weapon always in the right hand, a side parting, an eye patch. Either accept the flip or draw both sides for the frames where it shows.
Top-down games usually need four directions: down (facing the camera), up (back to the camera), left and right. Down and up need their own drawings. Left and right can be a mirrored pair. Some games add diagonals for eight directions, which doubles the work again. For a jam, four directions with mirroring means three sets of drawings, and that is already plenty.
A practical order: draw the down facing idle first, since it shows the face and becomes the character's portrait. Then the side view, then the back.
Laying out the sprite sheet
Keep the sheet regular. One row per animation, one column per frame, every cell the same size. For a top-down 16 by 16 character with four directions:
cell 16 x 16, sheet 128 x 128

row 0  idle down    4 frames
row 1  idle up      4 frames
row 2  idle side    4 frames   (mirror for left)
row 3  walk down    4 frames
row 4  walk up      4 frames
row 5  walk side    4 frames   (mirror for left)
row 6  hurt         2 frames
row 7  spare
In code, an animation is just a row index, a frame count and a list of durations. Here is a minimal engine-agnostic version:
struct Anim { row: u32, durations_ms: &'static [u32] }

const WALK_SIDE: Anim = Anim { row: 5, durations_ms: &[100, 100, 100, 100] };

/// Returns the source rectangle (x, y, w, h) for the current time in the animation.
fn frame_rect(anim: &Anim, elapsed_ms: u32, cell: u32) -> (u32, u32, u32, u32) {
    let total: u32 = anim.durations_ms.iter().sum();
    let mut t = elapsed_ms % total;
    let mut frame = 0;
    for (i, d) in anim.durations_ms.iter().enumerate() {
        if t < *d { frame = i as u32; break; }
        t -= d;
    }
    (frame * cell, anim.row * cell, cell, cell)
}
Mirroring is a flag at draw time: flip the texture coordinates horizontally, or use a negative x scale, depending on what your renderer offers. Keep the anchor point at the feet, horizontally centred, so the sprite flips around its own centre instead of jumping a pixel sideways.
Draw the character at whole pixel positions and scale by integers, otherwise all that careful one pixel animation turns into shimmer. The pixel art camera piece explains how to set that up.
Questions people ask
Should the outline be part of the 16 pixels?
Yes. The outline counts towards the cell, so a 16 by 16 character with a one pixel outline has at most 14 by 14 pixels of interior. This is why small sprites often drop the outline on parts of the body, such as the inside of the arms.
How do I keep animations consistent?
Use onion skinning in your editor, which shows the previous and next frames faintly behind the current one. Check that the feet line and the head height stay where they should.
Can I draw at 32 by 32 and shrink it to 16 by 16?
Not usefully. Downscaling produces mixed colours and broken lines. Redraw at the smaller size and use the larger version only as a reference.
A small exercise
Draw one character at 16 by 16 with the nine colour palette above, then a four frame walk to the right, and play it back at 100 milliseconds per frame over a strip of ground. Then mirror it and watch it walk left. If anything looks off when flipped, note which pixel it is. That list becomes the start of your character's style guide.
Filed in 2D Craft

Written by Jun Takemura
Jun draws and animates pixel art and writes about the craft side of 2D games: sprites, tiles, palettes, animation and the small design choices that make a game feel finished. Lives in Osaka and never misses a jam weekend.